נגדיר טופס שבתוכו יהיו הפקדים שבהמשך. בטופס יש שימוש ב-form builder. ליד כל שם פקד יש את סוג הפקד שנשתמש בו בטופס.
zimun-torim.component.ts
export class ZimunTorim{
  constructor(private fb: FormBuilder){}

  zimunTorimForm = this.fb.group({
    clinicDetails: this.fb.group({
      clinicCity: [''],  // select
      clinicBranch: [''] // select after city select
    }),

    doctorDetails: this.fb.group({
      doctorType: [''], // radio buttons
      doctorDays: ['']  // checkbox
    }),

    patientDetails: this.fb.group({
      patientName: [''],    // textbox
      patientDob: [''],     // calendar
      patientPhone: [''],   // mask
      patientComments: [''] // textarea
    })
  });
}
המבנה הבסיסי של דף הטופס הוא כזה:
zimun-torim.component.html
<div class="container my-5">
  <h1>Angular Clinic</h1>
  <form [formGroup]="zimunTorimForm" (ngSubmit)="submit()">
    <div formGroupName="clinicDetails">
      <h3>Clinic Details</h3>

    </div>

    <div formGroupName="doctorDetails">
      <h3>Doctor Details</h3>

    </div>

    <div formGroupName="patientDetails">
      <h3>Patient Details</h3>

    </div>
    <button class="btn btn-primary" type="submit"
        [disabled]="!zimunTorimForm.invalid"></button>
  </form>
</div>
תיבת טקסט – Input
הפקד הכי פשוט הוא תיבת טקסט. נוסיף את הפקד של שם החולה – patientName לטופס.
zimun-torim.component.html
<div formGroupName="patientDetails">
  <h4>Patient Details</h4>
  <div class="col-md-3">
    <label for="patientName" class="form-label">Patient Name</label>
    <input type="text" formControlName="patientName" id="patientName" class="form-control">
  </div>
</div>

כפתורי רדיו – Radio buttons
לבחירה אחת מתוך כמה אפשרויות משתמשים בדרך כלל בכפתורי רדיו עגולים. ניתן את פקד כפתורי הרדיו לשדה doctorType.
zimun-torim.component.html
div formGroupName="doctorDetails" class="my-3">
  <h4>Doctor Details</h4>
  <div class="form-check">
    <label for="doctorType">Doctor Type:</label>
        <div>
          <input id="doctorTypeHeart" type="radio" value="heart"
            name="doctorType" formControlName="doctorType"
            class="form-check-input">
          <label for="doctorTypeHeart" class="form-check-label">Heart</label>
        </div>

        <div>
          <input id="doctorTypeEyes" type="radio" value="eyes"
              name="doctorType" formControlName="doctorType"
              class="form-check-input">
          <label for="doctorTypeEyes" class="form-check-label">Eyes</label>
        </div>
  </div>
</div>

אירוע בחירת radio buttons
את הערך של הכפתור אפשר לקבל גם בזמן הבחירה של המשתמש. האפשרות הזאת יעילה כשיש שלב הבא בטופס שצריך לטעון על פי הבחירה של הכפתור. על מנת לבצע את זה נשתמש באירוע change.
zimun-torim.component.html
<div>
  <input id="doctorTypeHeart" type="radio" value="heart"
      name="doctorType" formControlName="doctorType"
      class="form-check-input"
      (change)="changeDoctorType($event)">
  <label for="doctorTypeHeart" class="form-check-label">Heart</label>
</div>
את הפעולה של הפונקציה נבצע ב-ts.
zimun-torim.component.ts
changeDoctorType(e){
    console.log(e.target.value);
}
גם את הערכים של כל הטופס אפשר לראות בקונסול.
zimun-torim.component.ts
submit(){
    console.log(this.zimunTorimForm.value);
}
תיבת סימון- Checkbox
לבחירה של כמה אפשרויות ביחד משתמשים ב-checkbox. את הנתונים של הקוביות נשאב ממערך נתונים שמוגדר ב-ts.
zimun-torim.component.ts
checkboxData: Array<any> = [
    { name: 'Sunday', value: 'sunday' },
    { name: 'Monday', value: 'monday' },
    { name: 'Tuesday', value: 'tuesday' },
    { name: 'Wednesday', value: 'wednesday' },
    { name: 'Thursday', value: 'thursday' }
];
את הגדרת השדה בטופס נשנה להגדרת של מערך ערכים.
doctorDetails: this.fb.group({
      doctorType: [''], // radio buttons
      doctorDays: this.fb.array([])  // checkbox
}),
עכשיו ניצור את המנגנון שמטפל בערכים של תיבות הסימון. אם יש לנו בחירה של תיבה, נוסיף אותה למערך ששומר את הערכים הנבחרים. אם יש הסרה, נעבור על כל המערך ונסיר את מי שלא מסומן.
onCheckboxChange(e) {
    let doctorDays: FormArray = this.zimunTorimForm.get('doctorDetails').get('doctorDays') as FormArray;

    if (e.target.checked) {
      doctorDays.push(new FormControl(e.target.value));
    } else {
      const index = doctorDays.controls.findIndex(x => x.value === e.target.value);
      doctorDays.removeAt(index);
    }
}
עכשיו נוסיף את התיבות לקובץ ה-html.
zimun-torim.component.html
<div class="form-check">
  <label for="doctorDays"><strong>Doctor Days:</strong></label>

  <div class="form-group">
    <div *ngFor="let data of checkboxData">
      <label>
        <input type="checkbox" [value]="data.value"
        (change)="onCheckboxChange($event)"
        class="form-check-input"/>
        {{data.name}}
      </label>
    </div>
  </div>
</div>
תיבת בחירה – Select
נתחיל בייצור הנתונים של תיבת הבחירה.
zimun-torim.component.ts
selectData: Array<any> = [
    { name: 'Tel Aviv', value: 3 },
    { name: 'Beer Sheva', value: 2 },
    { name: 'Jerusalem', value: 4 },
    { name: 'Haifa', value: 1 },
];
עכשיו נכניס את פקד ה-select שיעבור על כל הערכים במערך ויכניס אותם לרשימה.
zimun-torim.component.html
<div class="col-md-3">
        <label for="patientName" class="form-label">City </label>
        <select formControlName="clinicCity" class="form-select">
          <option [ngValue]="null" disabled>Choose your city</option>
          <option *ngFor="let data of selectData" [ngValue]="data">
           {{ data.name }}
          </option>
        </select>
</div>
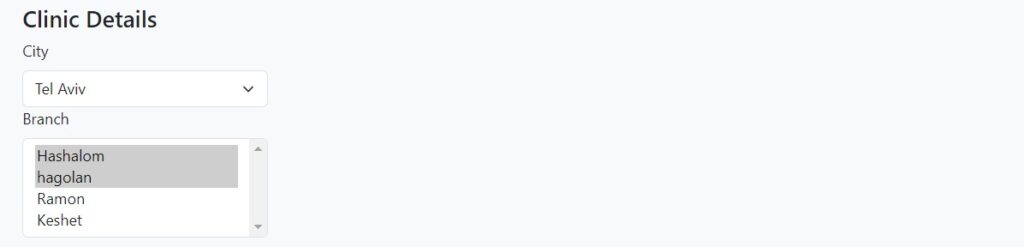
תיבת בחירה – בחירה מרובה
נייצר את המערך שמחזיק את הנתונים לשדה.
zimun-torim.component.ts
multiSelectData: Array<any> = [
    { name: 'Hashalom', value: 34 },
    { name: 'hagolan', value: 42 },
    { name: 'Ramon', value: 4 },
    { name: 'Keshet', value: 15 },
];
עכשיו ניתן לתבנית לייצר את הפקד.
zimun-torim.component.html
<div class="col-md-3">
        <label for="clinicBranch" class="form-label">Branch </label>
        <select multiple formControlName="clinicBranch" class="form-select">
          <option *ngFor="let data of multiSelectData" [ngValue]="data">
           {{ data.name }}
          </option>
        </select>
</div>