The Observer Design Pattern מגדיר עבורנו יחסים של יחיד לרבים בין אובייקטים, כך שכשמתבצע שינוי באובייקט שאנחנו עוקבים אחריו, כל התלויים בו יקבלו הודעה ויתעדכנו.
מה זה Observer Design Pattern?
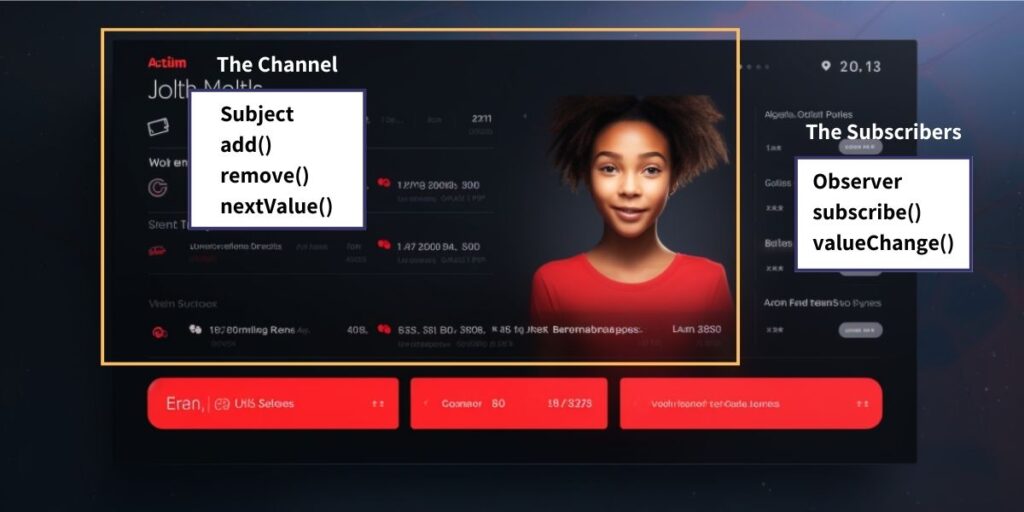
נניח שיש לכם ערוץ יוטיוב. בכל פעם כשאתם מעלים וידאו, כל המנויים שלכם מקבלים הודעה. הערוץ שלכם "נצפה" על ידי המנויים שהם "צופים". כשמעלים סרטון חדש, כלומר כשיש שינוי ב"מצב" של הערוץ, כל המנויים observers מקבלים הודעה.
אם נפרק את הדוגמא מלמעלה למונחים של Observer Design Pattern, יש לנו:
Subject – ערוץ היוטיוב – מה שאנחנו צופים בשינויים שלו. הוא מחזיק רשימה של מנויים observers ומודיע להם כשיש בו שינוי.
Observers – המנויים – הם מנויים ל-Subject ורוצים לבצע איזה פעולה כאשר יהיה בו שינוי.
במושגים של עולם הפיתוח, יש לנו:
Subject – ה-class שיש בו פונקציות של add, remove של observers, ופונקציה שמוציאה את ההודעות למנויים כשיש שינוי במצב.
Observer – ל-classes האלה יש פונקציה שנקראת כאשר יש שינוי ב-Subject.
דוגמא – תחנת מזג אויר
נקח לדוגמא אפליקציה של מזג אויר (subject). האפליקציה אוספת מידע ממספר סנסורים ומציגה את מזג האויר המעודכן.
המשתמשים באפליקציה מקבלים התרעות (observers) כאשר יש תנאים מסויימים למזג האויר. למשל:
- צפוי גשם.
- הטמפרטורה יורדת מתחת ל-0 מעלות.
עם Observer Design Pattern, האפליקציה לא צריכה לדעת את הפרטים של המשתמשים. היא שולחת את המידע לכל מי שרשום לשירות שלה.
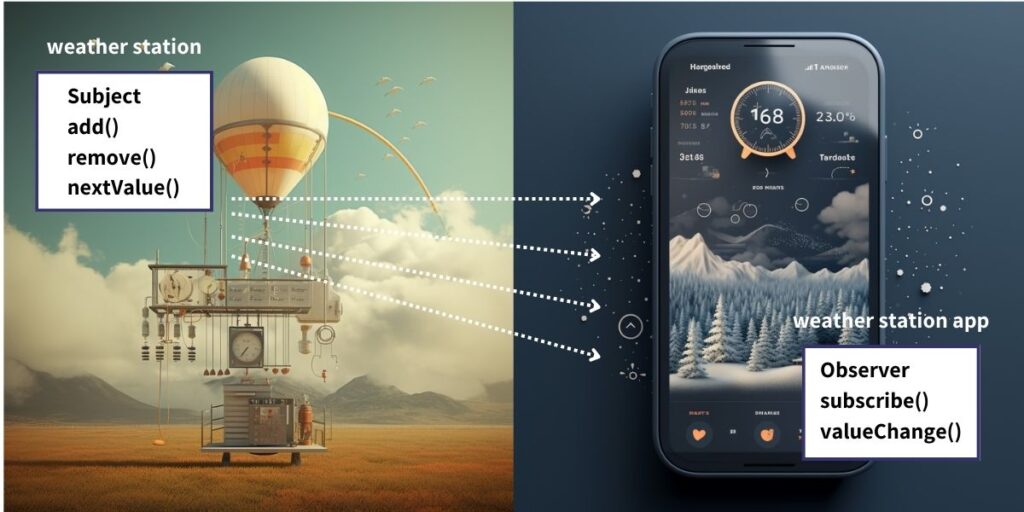
החלקים של הפעולה הם:
Weather Station App (Subject) – אוספת את המידע, מודיעה למי שרשום אליה.
Notifications/Alerts (Observers) – מחכים לעדכונים, מתבצעת פעולה כאשר מגיע העדכון.
נראה איך זה יראה בקוד.
class WeatherStation {
    constructor() {
        this.observers = [];
        this.weatherData = { temperature: 0, humidity: 0, pressure: 0 };
    }

    addObserver(observer) {
        this.observers.push(observer);
    }

    removeObserver(observer) {
        const index = this.observers.indexOf(observer);
        if (index > -1) {
            this.observers.splice(index, 1);
        }
    }

    notifyObservers() {
        for (const observer of this.observers) {
            observer.update(this.weatherData);
        }
    }

    setWeatherData(newWeatherData) {
        this.weatherData = { ...this.weatherData, ...newWeatherData };
        this.notifyObservers();
    }
}

class WeatherAlert {
    constructor(alertType) {
        this.alertType = alertType;
    }

    update(weatherData) {
        // Basic demonstration: you might have more complex logic here in a real app
        console.log(`Weather Alert [${this.alertType}]:
           New weather data received!`, weatherData);
    }
}

// Example usage
const weatherStation = new WeatherStation();

const rainAlert = new WeatherAlert("Rain");
const freezeAlert = new WeatherAlert("Freeze");

weatherStation.addObserver(rainAlert);
weatherStation.addObserver(freezeAlert);

weatherStation.setWeatherData({ temperature: 25, humidity: 80, pressure: 1013 });
// Weather Alert [Rain]: New weather data received!
// { temperature: 25, humidity: 80, pressure: 1013 }
// Weather Alert [Freeze]: New weather data received!
// { temperature: 25, humidity: 80, pressure: 1013 }

weatherStation.setWeatherData({ temperature: -1, humidity: 80, pressure: 1010 });
// Weather Alert [Rain]: New weather data received!
// { temperature: -1, humidity: 80, pressure: 1010 }
// Weather Alert [Freeze]: New weather data received!
// { temperature: -1, humidity: 80, pressure: 1010 }
מה יש לנו פה?
WeatherStation (Subject)
- addObserver(observer) – מוסיף observer שיקבל את ההודעות.
- removeObserver(observer) – מוריד observer מרשימת מקבלי ההודעות.
- notifyObservers – מודיע לכל הרשומים על השינויים.
- setWeatherData(newWeatherData) – מעדכן את המידע ושולח הודעה לנרשמים.
WeatherAlert (Observer)
- update(weatherData) – מבצע פעולה על סמך המידע שהתקבל. באפליקציה אמיתית, פה היתה פעולה של הצגה או שליחה של המידע, למשל.
כשיש קריאה ל-setWeatherData בתוך WeatherStation מתעדכן ה-weatherData שמודיע לכל הנרשמים שלו על המידע.
דוגמא נוספת – אתר מכירות
נקח לדוגמא אתר מכירות. נניח שיש לנו מספר קומפוננטות שצריכות להתעדכן כאשר הגולש מכניס מוצר חדש לעגלה, למשל סיכום סכום הרכישה בעגלה, רשימת המוצרים לרכישה, באנרים פרסומיים ועוד.
נראה דוגמא לקוד אנגולרי.
Cart Service (Subject)
ב-service אנחנו מנהלים את המוצרים שנמצאים בעגלה ומחזיקים רשימה של observers שצריך להודיע להם כשיש הוספה של מוצר.
import { Injectable } from '@angular/core';
import { BehaviorSubject, Observable } from 'rxjs';

@Injectable({
  providedIn: 'root'
})
export class CartService {
  private cartItems: any[] = [];
  private cartSubject = new BehaviorSubject(this.cartItems);

  addToCart(item: any): void {
    this.cartItems.push(item);
    this.cartSubject.next(this.cartItems);
  }

  getCartObservable(): Observable<any[]> {
    return this.cartSubject.asObservable();
  }
}
Cart Component (Observer)
הקומפוננטה הזאת מציגה את תוכן העגלה ומתעדכנת כאשר מוכנס אליה מוצר חדש.
import { Component, OnInit, OnDestroy } from '@angular/core';
import { CartService } from './cart.service';
import { Subscription } from 'rxjs';

@Component({
  selector: 'app-cart',
  template: `
    <h2>Your Cart</h2>
    <ul>
      <li *ngFor="let item of cartItems">{{ item.name }}</li>
    </ul>
  `
})
export class CartComponent implements OnInit, OnDestroy {
  cartItems: any[] = [];
  cartSubscription!: Subscription;

  constructor(private cartService: CartService) {}

  ngOnInit(): void {
    this.cartSubscription = this.cartService.getCartObservable().subscribe(items => {
      this.cartItems = items;
    });
  }

  ngOnDestroy(): void {
    this.cartSubscription.unsubscribe();
  }
}
Add Product Component
הקומפוננטה הזאת מאפשרת למשתמשים להוסיף מוצרים.
import { Component } from '@angular/core';
import { CartService } from './cart.service';

@Component({
  selector: 'app-add-product',
  template: `
    <button (click)="addItem()">Add Item to Cart</button>
  `
})
export class AddProductComponent {
  constructor(private cartService: CartService) {}

  addItem(): void {
    const newItem = { name: `Item ${Math.floor(Math.random() * 100)}` };
    this.cartService.addToCart(newItem);
  }
}
למה להשתמש ב-Observer Design Pattern?
Decoupling – ה-subject לא צריך לדעת כלום על העוקבים אחריו.
Dynamic Relationships – אפשר להוסיף ולהוריד Observers בזמן ריצה בלי לשנות את האובייקטים.
Broadcast Communication – שינויים במידע באובייקט אחד משודרים להרבה אובייקטים אחרים.
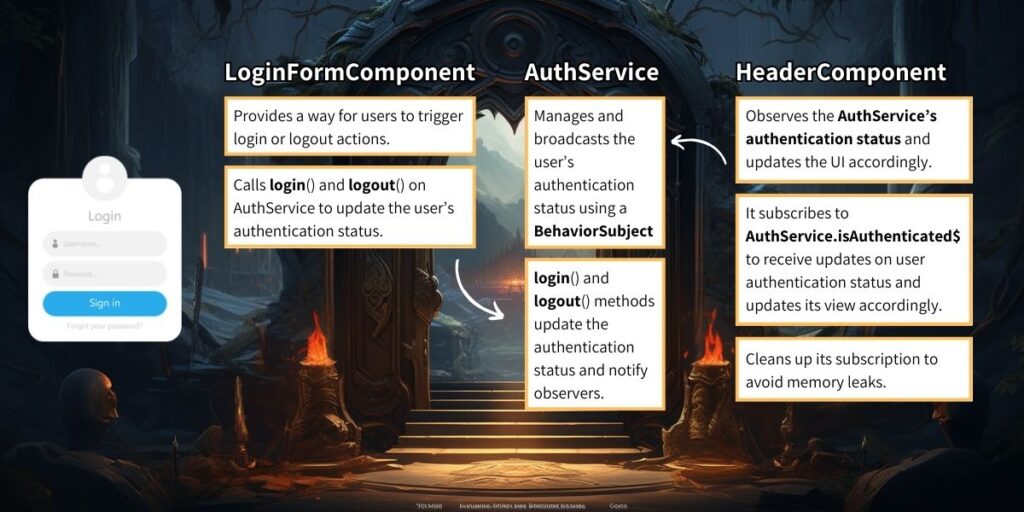
דוגמא נוספת – אימות משתמש
נראה דוגמא אנגולרית נוספת שבה נבחן authentication של משתמש. כאשר משתמש מתחבר לחשבון שלו יהיו מספר קומפוננטות שיצטרכו לקבל את המידע הזה כמו תפריט ראשי, תפריט צד וכו'
AuthService (Subject)
import { Injectable } from '@angular/core';
import { BehaviorSubject, Observable } from 'rxjs';

@Injectable({
  providedIn: 'root'
})
export class AuthService {
  private isAuthenticatedSubject = new BehaviorSubject<boolean>(false);
  isAuthenticated$ = this.isAuthenticatedSubject.asObservable();

  login(): void {
    // Authentication logic (e.g., API call) would be here...
    this.isAuthenticatedSubject.next(true);
  }

  logout(): void {
    // Logout logic would be here...
    this.isAuthenticatedSubject.next(false);
  }
}
HeaderComponent (Observer)
הקומפוננטה הזאת מציגה מידע לגולש ב-header ומתעדכנת כאשר הגולש נכנס לחשבון.
import { Component, OnInit, OnDestroy } from '@angular/core';
import { AuthService } from './auth.service';
import { Subscription } from 'rxjs';

@Component({
  selector: 'app-header',
  template: `
    <ng-container *ngIf="isAuthenticated; else loggedOutTemplate">
      <p>Welcome, User!</p>
    </ng-container>
    <ng-template #loggedOutTemplate>
      <p>Please log in.</p>
    </ng-template>
  `
})
export class HeaderComponent implements OnInit, OnDestroy {
  isAuthenticated: boolean = false;
  private authSubscription!: Subscription;

  constructor(private authService: AuthService) {}

  ngOnInit(): void {
    this.authSubscription = this.authService.isAuthenticated$.subscribe(
      isAuthenticated => {
        this.isAuthenticated = isAuthenticated;
      }
    );
  }

  ngOnDestroy(): void {
    this.authSubscription.unsubscribe();
  }
}
LoginFormComponent
הקומפוננטה מאפשרת כניסה ויציאה מהחשבון.
import { Component } from '@angular/core';
import { AuthService } from './auth.service';

@Component({
  selector: 'app-login-form',
  template: `
    <button (click)="login()">Login</button>
    <button (click)="logout()">Logout</button>
  `
})
export class LoginFormComponent {
  constructor(private authService: AuthService) {}

  login(): void {
    this.authService.login();
  }

  logout(): void {
    this.authService.logout();
  }
}
בדרך הזאת כל קומפוננטה שצריכה יכולה לגשת למצב ה-login של המשתמש.
