ראינו איך לעצב את המסך עם flexbox. יש בעיה אחת, אנחנו מבצעים את העיצוב ורואים אותו במכשיר לדוגמא, לא כל המכשירים זהים ויציגו את המסך באותה הצורה. המסכים יכולים להיות גדולים או קטנים יותר ורוצים ליצור עיצוב רספונסיבי.
גם באותו המכשיר, משתמש יכול לסובב את המכשיר ולצפות בתוכן עם מכשיר מאונך או מאוזן.
Dimensions API
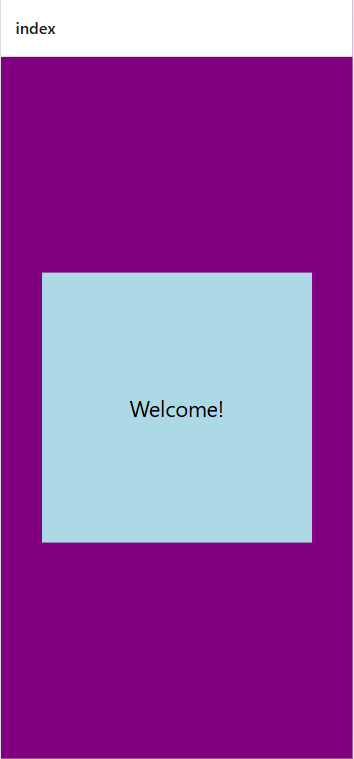
נתחיל עם קוד פשוט של קופסא כחולה על רקע סגול.
export default function Index() {
  return (
    <View style={styles.container}>
      <View style={styles.box}>
        <Text style={styles.text}>Welcome!</Text>
      </View>
    </View>
  );
}

const styles = StyleSheet.create({
  container:{
    flex: 1,
    backgroundColor: "purple",
    alignItems: "center",
    justifyContent: "center"
  },

  box:{
    width: 300,
    height: 300,
    backgroundColor: "lightblue",
    alignItems: "center",
    justifyContent: "center"
  },

  text:{
    fontSize: 24
  }
})
ככה זה נראה:

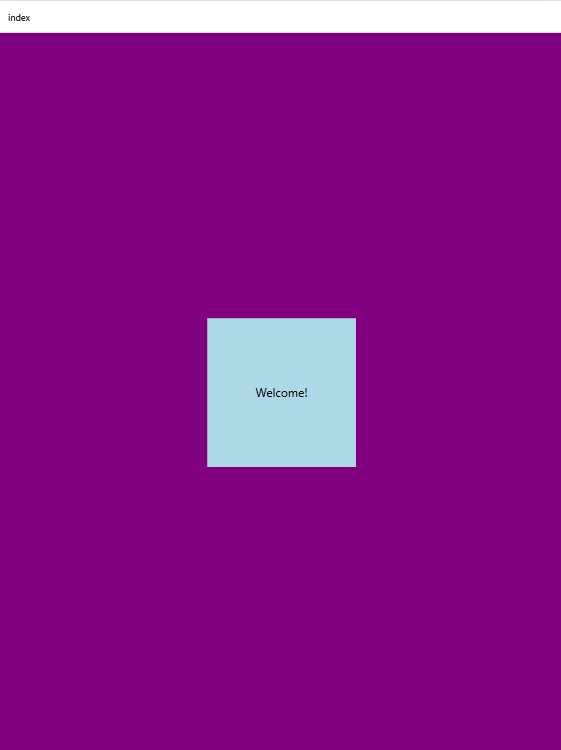
אם נסתכל על תצוגה של iPad, זה יראה ככה:

הפונט קטן והקופסא הפנימית של מותאמת.
אפשר להשתמש באחוזים:
box:{
    width: "70%",
    height: "40%",
    backgroundColor: "lightblue",
    alignItems: "center",
    justifyContent: "center"
},
אבל הבעיה היא שהמסכים לא גדלים באותו היחס בין הרוחב לגובה, ולכן התצוגה עדיין לא מתאימה. ויש גם את העניין של גודל הפונט. בשביל זה נשתמש ב-Dimensions API.
נייבא את Dimensions לתוכנית ונקבל את הגודל של החלון. נשתמש במידות האלה לקבוע דינמית את הגודל של הרכיבים בחלון.
import { View, StyleSheet, Text, Dimensions } from "react-native";

export default function Index() {
  return (
    <View style={styles.container}>
      <View style={styles.box}>
        <Text style={styles.text}>Welcome!</Text>
      </View>
    </View>
  );
}

const windowWidth = Dimensions.get("window").width;
const windowHeight = Dimensions.get("window").height;

const styles = StyleSheet.create({
  container:{
    flex: 1,
    backgroundColor: "purple",
    alignItems: "center",
    justifyContent: "center"
  },

  box:{
    width: windowWidth > 500 ? "70%" : "90%",
    height: windowHeight > 600 ? "60%" : "90%",
    backgroundColor: "lightblue",
    alignItems: "center",
    justifyContent: "center"
  },

  text:{
    fontSize: windowWidth > 500 ? 50 : 24
  }
})
Dimensions API Drawback
הפתרון של שימוש ב-Dimensions לא מומלץ מכיוון שיש איתו בעיה. אם משנים את הכיוון של המסך, Dimensions לא מתעדכן ולא משנה את גודל הרכיבים בהתאם.
בקובץ app.json יש הגדרה של:
"orientation": "portrait",
כדי שתוכן המסך ישתנה עם הסיבוב, צריך לעדכן את הערך ל-default.
כדי להתמודד עם הסיבוב של המסך, נתחיל בייבוא של useState ו-useEffect.
import { useState, useEffect } from "react";
ניצור אובייקט states שיאחסן את גודל המסך. אחר כך ניצור משתנה שמאזין לשינוי בגדלים.
const [dimensions, setDimensions] = useState({
  window: Dimensions.get("window")
})

useEffect(() => {
  const subscription = Dimensions.addEventListener("change", ({window}) => {
    setDimensions({window});
  })
  return () => subscription?.remove();
})
נאחסן את הגדלים שהוצאנו:
const { window } = dimensions;
const windowWidth = window.width;
const windowHeight = window.height;
ונשתמש בהם בעיצוב. ככה נראה הקוד השלם:
import { useState, useEffect } from "react";
import { View, StyleSheet, Text, Dimensions } from "react-native";

export default function Index() {
  const [dimensions, setDimensions] = useState({
    window: Dimensions.get("window")
  })

  useEffect(() => {
    const subscription = Dimensions.addEventListener("change", ({window}) => {
      setDimensions({window});
    })
    return () => subscription?.remove();
  })

  const { window } = dimensions;
  const windowWidth = window.width;
  const windowHeight = window.height;

  return (
    <View style={styles.container}>
      <View style={[
        styles.box, {
            width: windowWidth > 500 ? "70%" : "90%",
            height: windowHeight > 600 ? "60%" : "90%"
          }
        ]}>
        <Text style={{fontSize: windowWidth > 500 ? 50 : 24}}>Welcome!</Text>
      </View>
    </View>
  );
}

const styles = StyleSheet.create({
  container:{
    flex: 1,
    backgroundColor: "purple",
    alignItems: "center",
    justifyContent: "center"
  },

  box:{
    backgroundColor: "lightblue",
    alignItems: "center",
    justifyContent: "center"
  },
})
עכשיו יש שינוי דינמי של הגדלים, אבל הקוד קצת עמוס. יש דרך פשוטה יותר להשיג את המטרה.
useWindowDimensions
נייבא את סיפריית useWindowDimensions מתוך react-native ואתחל את הגדלים מתוך הספרייה.
import { View, StyleSheet, Text, useWindowDimensions } from "react-native";

export default function Index() {
  const windowWidth = useWindowDimensions().width
  const windowHeight = useWindowDimensions().height
  ...
}
זאת הגישה המהירה והמומלצת.
SafeAreaView
נתחיל עם הצגה של המילה welcome בראש המסך.
import { View, StyleSheet, Text } from "react-native";

export default function Index() {
  return (
    <View style={styles.container}>
      <View style={ styles.box }>
        <Text style={ styles.text }>Welcome!</Text>
      </View>
    </View>
  );
}

const styles = StyleSheet.create({
  container:{
    flex: 1,
    backgroundColor: "lightblue",
  },

  box:{
    padding: 20,
  },

  text: {
    fontSize: 24,
    fontWeight: "bold",
    textAlign: "center"
  }
})
הבעיה היא, שבגלל שהטקסט מוצג למעלה, בחלק מהמסכים לא יראו אותו כי הוא יהיה מתחת לרכיבים שנמצאים בראש המשך כמו עדשה של מצלמה. אם נוסיף רווח למעלה, נראה את הטקסט, אבל אז הוא יהיה נמוך מידי עם רווח מיותר בחלק מהמסכים.
אנחנו רוצים להבין מה השטח הבטוח של המסך שבו נציג את התוכן.
נייבא את SafeAreaView מתוך react-native ונעטוף את כל התוכן ברכיב.
import { View, StyleSheet, Text, SafeAreaView } from "react-native";

export default function Index() {
  return (
    <SafeAreaView style={styles.safeContainer}>
      <View style={styles.container}>
        <View style={ styles.box }>
          <Text style={ styles.text }>Welcome!</Text>
        </View>
      </View>
    </SafeAreaView>
  );
}

const styles = StyleSheet.create({
  safeContainer: {
    flex: 1
  },
  ...
})
התוכן יוצג על ידי SafeAreaView לפי מקום התצוגה האפשרי במסך. כדי להמני ממסגרת לבנה מסביב לתוכן, אפשר לשים את צבע הרקע של המסך גם ב-safeContainer.
Platform Specific Code
אנחנו משתמשים בקוד שטוב לכל הפלטפורמות, אבל יש מקרים שבהם נרצה להשתמש בקוד ספציפי למערכת מסויימת.
Platform Module
ספריית Platform מאתרת את הפלטפורמה שבה משתמשים.
לשימוש בקוד ספציפי לספרייה, נזהה את המערכת ונתנה את הקוד.
marginTop: Platform.OS === "android" ? 25 : 0,
marginTop: Platform.OS === "ios" ? 30 : 0
השימוש מתאים לשינויים קטנים. אם יש שינוי גדול יותר אפשר להשתמש בדרך הזאת:
text: {
    ...Platform.select({
      ios: {
        color: "white",
        fontSise: 30
      },
      android: {
        color: "red",
        fontSise: 12
      }
    }),
    fontWeight: "bold",
    textAlign: "center"
}
למבנים מורכבים יותר, בהם יש הרבה הבדלים בין הפלטפורמות, כדאי להשתמש בקבצים שונים לקומפוננטות.
קובץ ל-IOS יהיה בשם: CustomComp.ios.js וקובץ CustomComp.andriod.js לאנדרואיד.
נייבא את הקומפוננטה המתואמת מתוך התיקייה שמכילה את שני הקבצים:
import CustomComp from './components/CustomComp/CustomComp'

export default function Index() {
  ...
  <CustomComp></CustomComp>
}
react יבחר את הקובץ המתאים לפלטפורמה.
