עיצוב
עיצוב ב-react native דומה לזה של עיצוב אפליקציות web. אחד ההבדלים הוא שלא משתמשים ב-CSS אלא בקוד של JS.
השמות דומים ל-CSS, אבל השמות נכתבים ב-Camel Case. למשל backgroundColor במקום background-color.
יש 2 גישות לעיצוב, עיצוב בתוך השורה inline וראינו דוגמאות לזה בפוסט הקודם. הגישה השנייה משתמשת ב-StyleSheet API שמאפשר להגדיר מספר עיצובים במקום אחד.
StyleSheet API
שימוש ב-inline style:
export default function Index() {
  return (
    <View style={{flex: 1, backgroundColor: "yellow", padding: 60}}>
      <Text>StyleSheet API</Text>
    </View>
  );
}
פחות מומלץ וקשה לתחזוקה.
שימוש ב-StyleSheet API – נותן משמעות לחבילת העיצוב, קריא יותר וקל להשתמש שוב בקוד.
import { View, Text, StyleSheet } from "react-native";

export default function Index() {
  return (
    <View style={styles.container}>
      <Text>StyleSheet API</Text>
    </View>
  );
}

const styles = StyleSheet.create({
  container:{ flex: 1, backgroundColor: "yellow", padding: 60 }
})
אפשר לשים את הקוד העיצובי בקובץ נפרד, להוסיף export ואז הקוד יהיה שמיש לקבצים רבים.
Multiple Styles
נראה איך להחיל כמה סגנונות בקובץ אחד.
import { View, Text, StyleSheet } from "react-native";

export default function Index() {
  return (
    <View style={styles.container}>
      <View style={styles.blueBox}>
        <Text>Blue box</Text>
      </View>
      <View style={styles.greenBox}>
        <Text>Green box</Text>
      </View>
    </View>
  );
}

const styles = StyleSheet.create({
  container:{ flex: 1, backgroundColor: "yellow", padding: 60 },
  blueBox: { backgroundColor: "blue", width: 100, height: 100, padding: 10 },
  greenBox: { backgroundColor: "green", width: 100, height: 100, padding: 10 }
})
אפשר לראות שיש עיצוב משותף ל-blueBox ול-greenBox. אפשר לכתוב את הקוד פעם אחת ולמחזר אותו.
import { View, Text, StyleSheet } from "react-native";

export default function Index() {
  return (
    <View style={styles.container}>
      <View style={[styles.box, styles.blueBox]}>
        <Text>Blue box</Text>
      </View>
      <View style={[styles.box, styles.greenBox]}>
        <Text>Green box</Text>
      </View>
    </View>
  );
}

const styles = StyleSheet.create({
  container:{ flex: 1, backgroundColor: "yellow", padding: 60 },
  box: { width: 100, height: 100, padding: 10 },
  blueBox: { backgroundColor: "blue" },
  greenBox: { backgroundColor: "green" }
})
נשתמש במערך של styles על מנת להחיל מספר סגנונות על אותו רכיב.
Box Model
הגובה והרוחב של אלמנטים מוגדרים במספרים מוחלטים. אפשר להגדיר אותם באחוזים. בדוגמא, מכיוון שה-container מוגדר כ-flex עם ערך 1, כלומר תופס את כל השטח הזמין על המסך, אפשר להגדיר את גודל ה-box באחוזים.
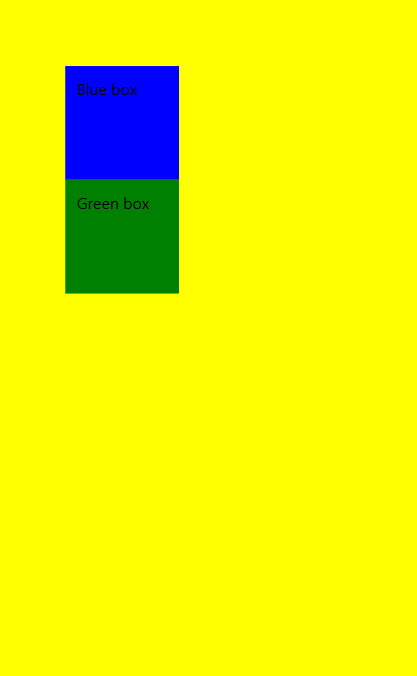
כך נראה שטח ה-box עם הערכים המוחלטים:

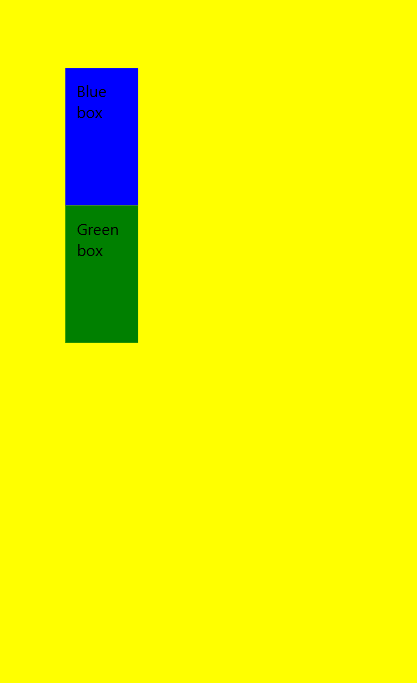
וכך הוא נראה אם מגדירים את האורך והרוחב ל-25%. ה-box תופס 25% מאורך המסך ו-25% מהרוחב שלו.

הערך של padding ממלא את אותו התפקיד כמו בעיצוב עמוד באינטרנט. הרווח שיש בתוך האובייקט בין המסגרת לאלמנטים שלו.
אפשר להגדיר בנפרד padding לאורך ולרוחב. באותה הדרך margin מקבל ערכים.
const styles = StyleSheet.create({
  container:{ flex: 1, backgroundColor: "yellow", padding: 60 },
  box: { width: "25%", height: "25%", paddingHorizontal: 10, paddingVertical: 30 },
  blueBox: { backgroundColor: "lightblue" },
  greenBox: { backgroundColor: "lightgreen" }
})
כדי להגדיר גבול, נגדיר כל חלק שלו בנפרד. עובי, צבע וסגנון.
box: {
    width: 100,
    height: 100,
    paddingHorizontal: 10,
    paddingVertical: 30,
    borderWidth: 2,
    borderColor: "purple",
    borderStyle: "dashed"
   },
אם רוצים פינות מעוגלות אפשר להשתמש ב-borderRadius.
Shadow and Elevation
על מנת להגדיר צל נשתמש ב-4 הגדרות. ההגדרות האלה עובדות ב-iPhone ולא ב-Android.
const styles = StyleSheet.create({
  container:{ flex: 1, backgroundColor: "yellow", padding: 60 },
  box: {
    width: 250,
    height: 250,
    paddingHorizontal: 10,
    paddingVertical: 30,
    borderWidth: 2,
    borderColor: "purple",
    borderStyle: "solid",
    borderRadius: 10,
    marginBottom: 20
   },
  blueBox: { backgroundColor: "lightblue" },
  greenBox: { backgroundColor: "lightgreen" },
  boxShadow: {
    shadowColor: "#333333",
    shadowOffset: {
      width: 6,
      height: 6
    },
    shadowOpacity: 0.6,
    shadowRadius: 4
  }
})
על מנת ליצור צל ב-android נשתמש בתכונת elevation.
const styles = StyleSheet.create({
  container:{ flex: 1, backgroundColor: "yellow", padding: 60 },
  box: {
    width: 250,
    height: 250,
    paddingHorizontal: 10,
    paddingVertical: 30,
    borderWidth: 2,
    borderColor: "purple",
    borderStyle: "solid",
    borderRadius: 10,
    marginBottom: 20
   },
  blueBox: { backgroundColor: "lightblue" },
  greenBox: { backgroundColor: "lightgreen" },
  boxShadow: {
    shadowColor: "#333333",
    shadowOffset: {
      width: 6,
      height: 6
    },
    shadowOpacity: 0.6,
    shadowRadius: 4
  },
  androidShadow: {
    elevation: 10
  }
})
Style Inheritance
נוסיף View חדש וניתן לו רקע שחור. לא נראה את הטקסט, כי גם הוא שחור.
<View style={styles.container}>
  <View style={styles.darkMode}>
    <Text>Style Inheritance</Text>
  </View>
  ...
</View>

const styles = StyleSheet.create({
  container:{ flex: 1, backgroundColor: "yellow", padding: 60 },
  darkMode: {
    backgroundColor: "black"
  },
  ...
})
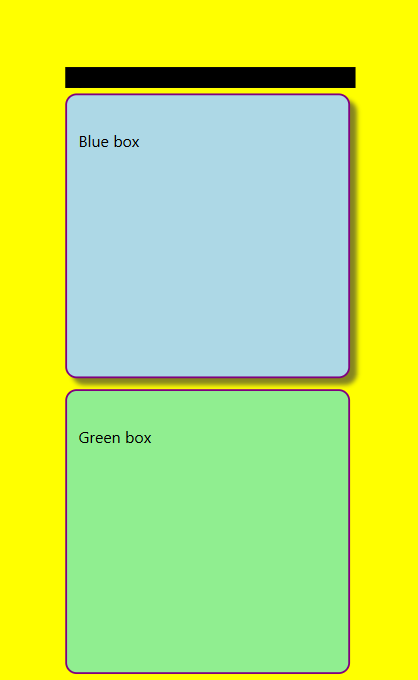
ככה נראה המסך:

נוסיף את הצבע הלבן לעיצוב ו… נראה שהטקסט עדיין שחור.
darkMode: {
  backgroundColor: "black",
  color: "white"
},
בעיצוב עמוד אינטרנט, אם נגדיר ב-div צבע גופן, כל האלמנטים שיש בתוך ה-div יקבלו את הצבע בירושה. ב-React Native זה לא עובד ככה. אין ירושה של עיצוב בין ה-View לבין אובייקט ה-Text. כדי הפוך את הטקסט ללבן צריך להחיל אותו על אובייקט ה-Text.
<View style={styles.container}>
  <View style={styles.darkMode}>
    <Text style={styles.darkModeText}>Style Inheritance</Text>
  </View>
  ...
</View>

const styles = StyleSheet.create({
  container:{ flex: 1, backgroundColor: "yellow", padding: 60 },
  darkMode: {
    backgroundColor: "black"
  },
  darkModeText: {
    color: "white"
  },
  ...
})
עכשיו הטקסט הופך ללבן. אם נוסיף רכיב Text נוסף בתוך רכיב ה-Text הקיים וניתן לו תכונת bold, הטקסט יהיה גם לבן וגם מודגש. יש ירושה בין text אחד לשני.
